Showing posts with label Underthings. Show all posts

Monday, 1 February 2016

No Smurfs were harmed in the making of this fabric...I promise!

It's taken me a while to get round to posting about this, but last week I had some great fun dyeing my corsetry satin from white to blue. I wanted something a little more fancy for my 1880s corset and, after looking at various originals for inspiration, I settled on mid blue.


Rather than buy a blue satin, I decided to use Vena Cava's cotton backed corsetry satin for strength and durability. However, as this only comes in a very limited colour range (black, white, pink and red) I knew I would have to experiment with dyes for the first time. Vena Cava's website said that the white satin dyes particularly well using Dylon so I did a little bit of research.

At first I intended to use the machine wash as this seemed the simplest option but, having read a few reviews, I wasn't convinced about the well-being of my washing machine (and when I say "mine", it isn't actually mine which meant that I was even more cautious about permanently staining the rubber seals or somebody else's washing). I therefore bought a packet of the Dylon hand wash powder in Ocean blue, the closest shade to the one I had envisaged for my corset.

The Dylon "Ocean Blue" dye and the white satin - BEFORE


Armed with a large plastic box, a stirring stick borrowed from some garden supplies, some salt and a pair of rubber gloves I was ready to begin. I pre-washed the satin in the machine, partly because the instructions directed me to wash the fabric first but also to pre-shrink it just in case. I then prepared the dye bath with the dye, warm water and salt, as per the instructions. This was really straightforward, although I was perturbed at first to see the dye, which initially turned from greyish-white to dark blue when the water was added, deepen to an intense shade of purple. Purple - definitely not blue! I thought, however, that perhaps it needed to be darker as not all of the colour would be absorbed so went ahead.


It took a while though before I was convinced that I was going to end up with blue fabric. When I first immersed the fabric, it sucked up the dye and turned an insipid shade of lilac! I spent the first half hour of stirring trying to tell myself that perhaps a purple corset wouldn't be so bad.

Uh oh - pale purple fabric!

 But, miraculously, as I stirred and stirred for the next hour or so the fabric became darker and darker purple and then, slowly, began to turn blue. Having studied textile histories I do have a basic understanding of dyeing processes, but actually watching it was rather like magic and how it went from a deep purple to bright blue remains a mystery. When is was time to remove the fabric from the bath it was a very bright shade of royal blue - not quite what the shade on the packet but OK and I suspected some of the colour would come back out in the rinsing.


The light is not particularly good in this picture, but the blue was very bright
Next came the hard work - it took absolutely ages of rinsing and wringing until the water began to run clear and even more colour came out when I washed the fabric in warm water. But eventually it was thoroughly washed and rinsed and ready to dry naturally. At this stage, it was still quite a bright blue and I left it to dry overnight. When I woke up in the morning, the first thing I did was to check the fabric and was surprised to discover that it had dried to a deepish shade of cornflower blue, nearly identical to the colour spot on the packaging!

The dried fabric - AFTER

I rinsed the fabric again in the machine for good measure to make sure any remaining dye was removed and then dried it and pressed it and pressed it and pressed it to get rid of all the creases from the washing, stirring and wringing! This was probably the one down side of this method. It wouldn't be great for delicate fabrics and it took a long time to de-crease. Having said that, having a steam generator iron really helped.

Despite all of the elbow grease required, the end result was very satisfactory. I now have all of my pieces cut out and ready to go, silky smooth and exactly the shade I imagined them. Hooray for Dylon! And although they definitely weren't around in 1880, I can't help thinking that my corset is going to be a beautiful shade of Smurf-blue!


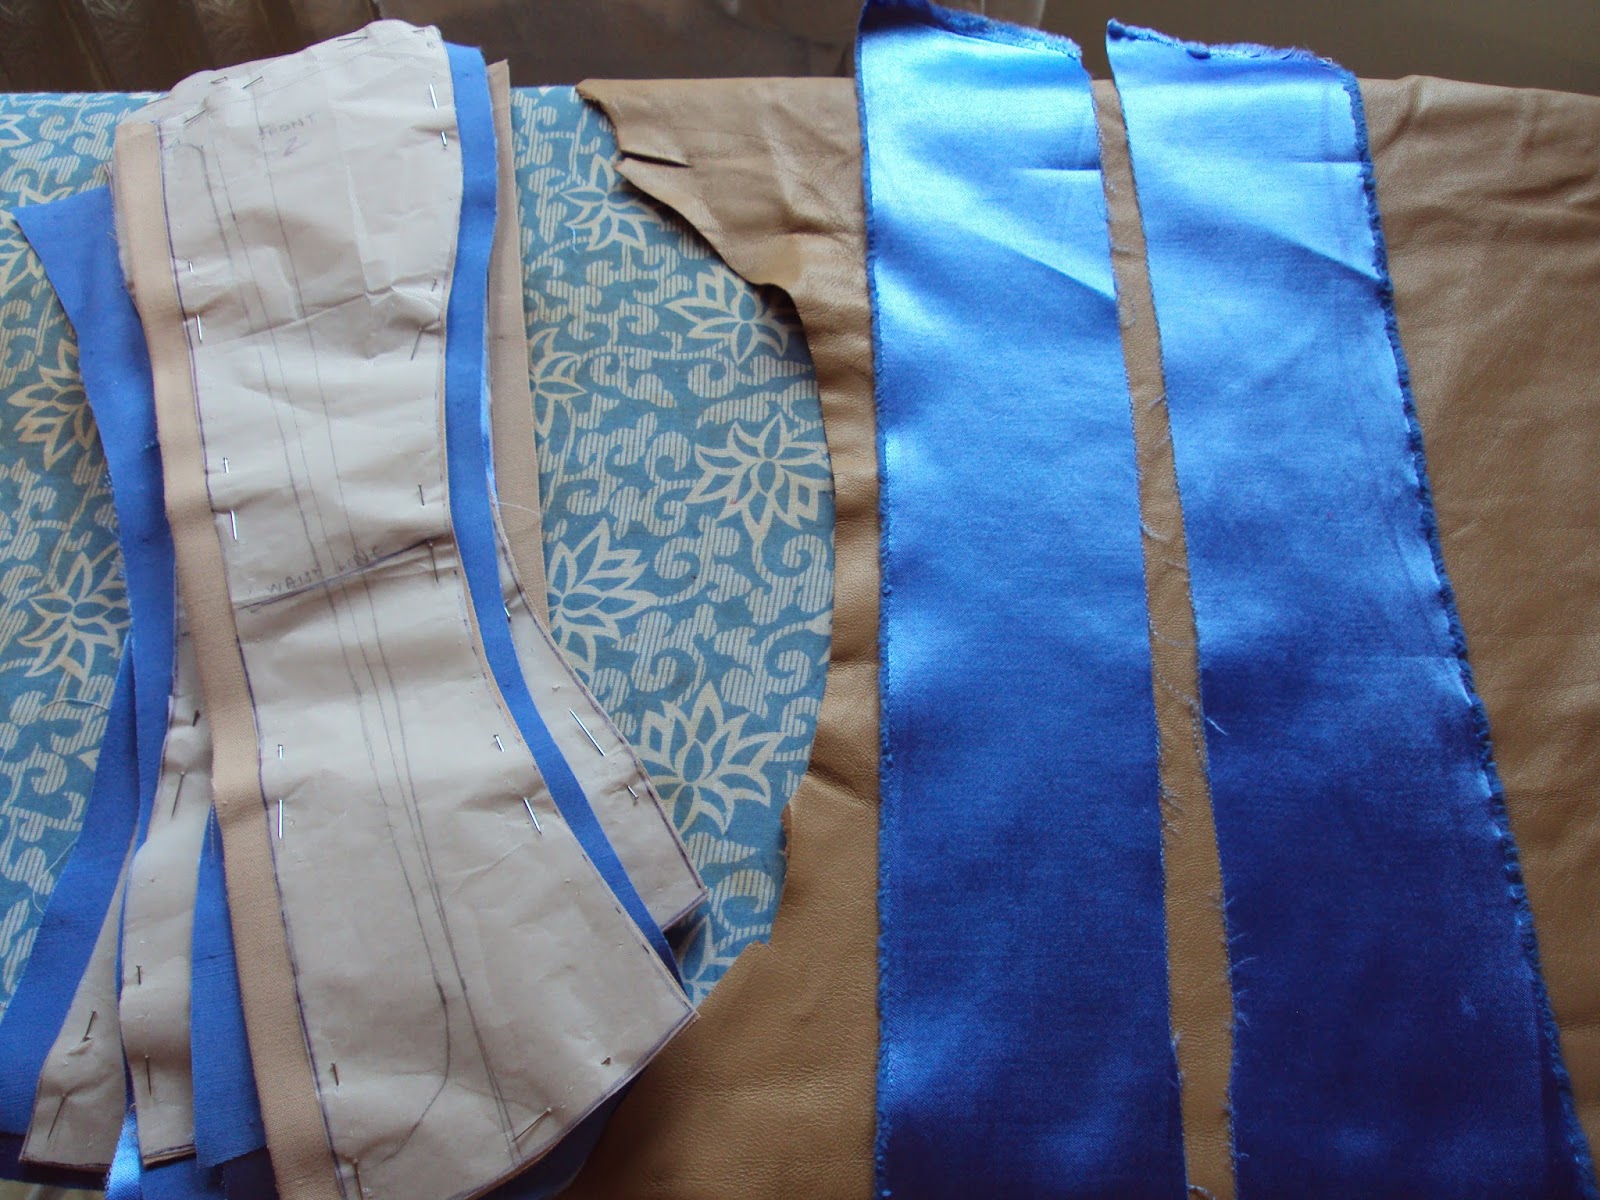
And, just to finish, here are some sneaky peeks of my experiments with the leather and some lace to get an idea of what the finished piece will look like...


In my next corset post I will share the mock-ups of the corset and what I did to adapt the pattern to fit. And hopefully this week I will actually be able to start constructing the corset now that my spoon busk has arrived. All will depend on how my experiments with sewing the leather go...Any tips much appreciated.

Wednesday, 20 January 2016

Inspiration for an 1870s/1880s corset

 Ever since I made my first corset, I've been promising myself that I would make myself a fancier one. However, as corsets are rarely destined to be seen, this project continually got pushed off the bottom of my list by other more pressing needs, such as more dresses to wear over the corset that I already had. It would be all very well having corsets in five colours, but who would know?!

Recently though, thanks to a new lifestyle away from teaching which means I actually have time to go out and have fun, not to mention exercise, I have lost about 4 inches round my waist. A new corset has therefore become more of a necessity as my old trusty white coutil mid-victorian corset now practically closes at the back.

When it came to choosing the type of corset I wanted to make, there were a number of factors in my decision. Firstly, I wanted to make a coloured corset, so a later date made sense in line with when more fancy colour choices became fashionable. This also fitted in perfectly with my costume plans for this year as I am really keen to get started on a trained 1876-1882 natural form gown which, of course, calls for a longer corset to achieve that smooth line over the hips, necessary to wriggle into a figure-hugging 1870s concoction. And finally, I fell in love with this...

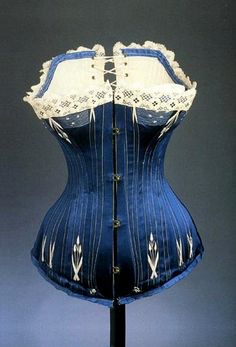
Victoria and Albert Museum - Corset, 1883
This corset is on the front cover of one of my fashion history dictionaries and I spent all of last year, throughout my Masters studies, looking at it longingly every time I opened the book. I love the combination of colours and textures and particularly the use of the leather over the boning channels.

So I set out to find a pattern close to this design and was delighted when I came across Reconstructing History's Ladies' 1880s Corset (RH944) which is very similar in shape.

RH944 - From Vena Cava Design

With the pattern all ready to go, I started to look for some more extant corsets to inspire my design and interpretation of the pattern. As well as the V&A corset, I also came across this corset with leather boning channels.

Met Museum - Worcester Corset, c.1898
And, inspired by Edouard Manet's "Nana", I looked for blue corsets to get some ideas for the kind of shades that I could aim for.

Edouard Mant, "Nana", 1877
Chicago Museum of History - Corset, 1884
Blue Silk Corset - (found here)
Kyoto Costume Institute - Corset, 1880s
The pale blue is probably the closet to the original portrait, but I am tempted to go a little darker as I love the rich dark blues of the other two examples. However, since I plan to dye the corsetry satin myself I have yet to find out how much control I will actually have over the resulting shade. I have a feeling it may just be "throw it in and hope for the best"! Fingers crossed it will come out somewhere between these examples.

Anyway, taking my inspiration from all of these corsets, my final design features blue silk satin with pale tan leather boning channels, lace trim and a spoon busk.


And here's the design in my album with the inspiration pictures...


I have already started work on mocking up the pattern and I will be sharing the initial stages of my cutting and fitting alterations in my next post. That's after I've been to buy the blue dye tomorrow morning! Hopefully, I will end up with a beautiful corset and lots of posts to share as it all fits together. On the other hand, I might just end up looking like a Smurf if all goes wrong with the dye! But then life wouldn't be fun if it wasn't for new experiences.

Sunday, 17 January 2016

Another HSM Challenge complete (almost!) - Girl's 1850s/1860s underwear

This project took a little longer than anticipated but, after a few mishaps and frustrations, it is (almost) finished. Designing and making children's costumes has been on my list for some time as I love miniature things and the idea of creating a tiny outfit with all of the features of adult 1860s dress, just shorter and cuter, really appealed to me.

I was particularly inspired by photographs, fashion plates and originals like these:

From Pinterest - https://uk.pinterest.com/pin/276760339577371220/
Borrowed from Val's post about little girls dresses at Time Travelling in Costume
An original costume from the FIDM Museum found on Pinterest - https://uk.pinterest.com/pin/54746951697569668/

Modes de Paris 1855 found on Pinterest - https://uk.pinterest.com/pin/321303754637425981/

However, not knowing any little girls who could wear the costumes, it has, for a long time, been just one of those ideas that gets pushed to the bottom of the pile. But, the opening of my Etsy shop encouraged me to start experimenting with some girls' dresses - I may not have little ones to dress up bit hopefully others out there do!

The first step was therefore to create some underwear for the correct silhouette and these are my prototypes pieces. I learnt quite a lot along the way and made a few errors (that I can happily avoid in the future) which I will detail below. As a result, I am not planning to sell these garments at the moment but now that I've got the construction sussed, the new and improved versions will be available soon on Etsy (fingers crossed).


GIRLS' 1850s/1860s UNDERTHINGS - Drawers, Crinoline and Mock Corset Bodice 

For this challenge I have created three undergarments for a girl aged approximately six years old. There are a pair of split drawers, exactly like an adult version just a lot smaller, a hooped crinoline skirt, and in order to support this and make the ensemble more comfortable to wear for a young child, a simple bodice stitched to resemble a child's corset. The crinoline buttons onto the bodice which allows the shoulders to support any weight and prevents any discomfort around the waist. This may not be 100% authentic but, as I am developing these pieces to be worn by modern little girls, I want them to be as wearable as possible.

The Challenge: 
Procrastination. As I mentioned above, tiny little dresses have been something I've thought about sewing for a long time but I never really had any reason to. I did get started on this project just before Christmas though - I had all of my patterns and fabric and so on all ready to go, but then sewing Christmas presents and other general festivities got in the way. When I saw the theme for January was procrastination, I knew right away that this was one of the projects that I wanted to get finished.


Fabric:
The split drawers are cotton lawn with cotton broderie anglais trim. The mock-corset bodice is a stiff cotton twill and for the crinoline I used a remnant of poly cotton broderie anglais that, quite handily, had a deep decorative border on both selvages. Given that the skirt is so short, this meant that I could cut the front and back alongside each other using the borders as a hem on both pieces.

Pattern: 
I used Butterick's 5901 pattern for inspiration and also as a guide for children's sizing as this is something I don't have any previous experience of. I worked quite freely though, only really using the bodice pieces to ensure the correct fit and cutting the other sections myself. I used my own methods for construction and didn't refer to the pattern instructions hardly at all. I also altered the numbers of hoops from three to two, changed the arrangement of tucks on the drawers and created my own system for attaching the crinoline to the bodice rather than having a separate petticoat underneath.


Year: 
Mid-Victorian 1850s-1860s

Notions:
Thread, bias binding, boning tape, 1" flat cotton tape, a shoelace for the drawstring on the drawers, 4 mother of pearl buttons on the bodice, 6 tiny antique buttons for attaching the crinoline to the bodice and boning*.

* A note on polyester boning: This is something that I have always avoided in the past, never believing that it could possibly be strong enough to hold its shape. And I was right! I had decided to use it on this occasion as I thought that it would be both lighter for a young child and more economical. I also, mistakenly, believed that the small size of the crinoline would compensate for the lack of strength in the boning. How wrong I was! The plastic boning was a complete disaster, failing to hold its own shape even without any form of skirt placed over the top of it. I thought at first that adding the second and third bones would help but in actual fact this made matters worse as the bones bent and twisted in different places and tangled themselves up in ways that didn't even look physically and scientifically possible. What's more, when I draped a thin circular cotton skirt over the top to see if balanced weight on all sides would correct the problem the whole thing collapsed!

Badly behaved boning - and that's only one hoop!


Fortunately I had some spiral steel boning on hand for a corset so I removed some of the polyester boning and tried the metal with much better results. The steel held its shape and is not as heavy as I though it would be as what I had was 7mm spiral steel rather than the wider spring steel I usually use for crinolines. I have therefore learnt my lesson and will be replacing the polyester with the steel as soon as I have cleaned it up. Unfortunately I didn't realise it was dirty until I had threaded it through the boning channel and found grey smudging all around the openings, one of the reasons that I will be keeping this set of underwear as a prototype. Especially as my sewing machine helped out by adding some oil to other seams! So once the boning has had a bath in some white spirit I will be able to replace the bones for a sturdier crinoline.


How historically accurate is it?
Overall the shape and silhouette are accurate. The drawers are just a miniature copy of adult split drawers with the exception of being longer and showing beneath the dress, a style that is often seen in period photographs, especially on younger girls. Similarly the crinoline creates the correct shape and the bodice does echo the shape of some extant children's corsets that I have seen. However, it is not actually a corset (I simply stitched lines to imitate boning channels) and I am not sure about the system for buttoning the crinoline onto the bodice. Having said that, many children's corsets did button rather than lace and it doesn't seem impossible that the crinoline would have been attached to the corset in some way as this was not unheard of in adult dress and would have made life easier for the child. As for the materials, the use of cotton for the bodice and drawers is accurate, but the broderie anglais poly cotton is not. This was a more commercial choice on my part in order to make the ensemble prettier without spending hours adding tucks and lace and so on. However, in future I will be looking at creating completely accurate ensembles as well so that people have the choice based on what they need the costumes for. It should also be noted that for a more authentic look a chemise should really be worn underneath these as well as a modesty petticoat.

A close up of the buttons and the stitched mock boning channels

Hours to complete:
In total probably about 6 or 7 but this involved a fair amount of thinking, figuring things out, experimenting and fighting with boning as well as tracing and drafting pattern pieces.

Tiny tucks and lace on the hems of the drawers


First worn:
I haven't yet found a little model this size and I don't have a child-sized dress form so the dress has only been modelled by my wastepaper basket! This is a trick I have used before when sewing an 1850s skirt for a young lady with a 24" waist. This was far too small for my mannequin but I needed to pleat the skirt directly onto a waistband placed around a body form. The only thing that I could find with the correct circumference that I could balance on my mannequin stand was an upside down wastepaper basket. And it actually worked quite well for modelling this dress. The twill bodice is quite stiff and the decorative stitching helped reinforce it to stand up by itself so I could get some good pictures.

My mannequin - a wastepaper basket balanced upside down on the feet for my dressform!

Total cost: 
All of the materials that I used were from my stash, with the exception of the steel boning. My estimated cost for these if I had to buy them is around £15, although I haven't yet completed my official calculations for pricing the items.


All in all this has been an exciting project and I'm glad that the procrastination theme encouraged me to get stuck in with this one. I can't wait to start designing and making dresses to go over these little ensembles and I am also planning to experiment with drafting more authentic ensembles with chemises and proper quilted or corded children's corsets. Watch this space!

Sunday, 8 November 2015

My first adventure into the 1880s

With all the leaves changing colours I thought I would share this outfit which has very autumnal tones even if I did wear it during the summer!


This was my very first 1880s bustle dress, made for a Victorian event on the Isle of Wight's steam railway last year. Although the railway did exist in the 1860s, I decided that clambering on and off of trains all weekend in a crinoline was not going to be practical. Moreover, I was eager to try out a new decade of Victorian fashion and the bustle silhouette.

The outfit was made using all Truly Victorian patterns : the TV101 Petticoat with wire bustle, TV170 Victorian Petticoats, TV261 1885 Four-gore Underskirt, TV364 Autumn Overskirt and TV463 1884 French Vest Bodice.

TV 101 - Image from Vena Cava Design
TV 170 - Image from Vena Cava Design

TV 261 - Image from Vena Cava Design
TV364 - Image from Vena Cava Design
TV 463 - Image from Vena Cava Design
I used two very reasonably priced curtaining fabrics that I found at a local fabric store - a rust-coloured faux silk and a thick rich brown cotton cloth, with white cotton undergarments trimmed with broderie anglais. The buttons are tiny antique glass buttons from a Czech factory with amber coloured centres each featuring a cameo, held in brass-coloured metal frames.


I very much enjoyed wearing this dress and it was the perfect choice for steam travel. Easy to wear and to ride on the trains.


I accessorised with vintage rust-coloured gloves, a small antique wooden case, my Vena Cava lace parasol (although I can't wait to have a go at covering my own parasol) and a small bonnet made using the same materials as the outfit and Lynn McMasters late Victorian pattern.


And I had lots of fun posing for photographs on and off of the trains, including some beautiful shots taken by a photographer friend who created some really lovely images for me.


Photographs courtesy of David White Photography, Ventnor, IoW
Photograph courtesy of David White Photography, Ventnor, IoW
I even considered running away to pursue a career on the stage with Mr Alexander's Travelling Show! He very kindly let me make use of his beautiful stage for a photo shoot and I made the most of the opportunity to try out some theatrical poses!

With Mr Alexander, and auditioning....(for what I'm not quite sure!)


Later, when the heat finally got to me and the public had gone home, I did something very un-Victorian and decided to remove my dress and relax in my underwear. This may have been very unlady-like and inauthentic but it did mean that I got some nice pictures of my underpinnings!


All in all this is probably my favourite of all of my outfits so far and I am keen to do more 1880s in the future. I already have all sorts of things in my stash lined up for bustle projects- fabrics and trimmings and buttons.... I can't wait!