Tuesday 21 June 2016

The best of intentions...and a new project

Please don't ask me where the best part of this year has disappeared to. Things started off so well in January. Perhaps too well. I tackled not one, but two Historical Sew Monthly projects, and began the 1880s blue satin and leather corset that I had been dreaming of making for so long. Things seemed to be advancing at a more than satisfactory pace and I had high hopes of sticking to my plans to actually complete the HSM challenges this year.

And then life got in the way, as it invariably does. That said, there are things that are sometimes more important than sewing. Working and earning money to pay for the sewing to start with and needless to say looking after yourself, your home and the people you love do have to come first.

In any case, the result has been a complete lack of progress where historical sewing projects are concerned since February. Indeed, aside from the odd mending or alteration job not much stitch work has been happening at all, mostly due to temporarily taking on full time hours at the day job.

But I have good news. I am back to part time hours and sewing again and this time for a very exciting project. I have been invited by the Llandrindod Wells Victorian Festival to appear at this year's festival as a Young Queen Victoria. This is of course a great honour in itself, but the best part for me is the opportunity to make the costumes for the young queen. In fact, work has already begun on the outfits which will include 1840s undergarments as well as day and evening dresses and accessories.

http://llandrindodvictoria.blogspot.co.uk/


To document this project I have set up a separate blog dedicated to "Becoming Victoria". The plan, believe it or not, is to post updates daily (or as close as possible). A challenge in itself but certainly a motivating one! As such, I may not be posting here frequently for some time but to keep up with latest news on Her Majesty's wardrobe please join me at "Becoming Victoria" between now and August.

Monday 1 February 2016

No Smurfs were harmed in the making of this fabric...I promise!

It's taken me a while to get round to posting about this, but last week I had some great fun dyeing my corsetry satin from white to blue. I wanted something a little more fancy for my 1880s corset and, after looking at various originals for inspiration, I settled on mid blue.


Rather than buy a blue satin, I decided to use Vena Cava's cotton backed corsetry satin for strength and durability. However, as this only comes in a very limited colour range (black, white, pink and red) I knew I would have to experiment with dyes for the first time. Vena Cava's website said that the white satin dyes particularly well using Dylon so I did a little bit of research.

At first I intended to use the machine wash as this seemed the simplest option but, having read a few reviews, I wasn't convinced about the well-being of my washing machine (and when I say "mine", it isn't actually mine which meant that I was even more cautious about permanently staining the rubber seals or somebody else's washing). I therefore bought a packet of the Dylon hand wash powder in Ocean blue, the closest shade to the one I had envisaged for my corset.

The Dylon "Ocean Blue" dye and the white satin - BEFORE


Armed with a large plastic box, a stirring stick borrowed from some garden supplies, some salt and a pair of rubber gloves I was ready to begin. I pre-washed the satin in the machine, partly because the instructions directed me to wash the fabric first but also to pre-shrink it just in case. I then prepared the dye bath with the dye, warm water and salt, as per the instructions. This was really straightforward, although I was perturbed at first to see the dye, which initially turned from greyish-white to dark blue when the water was added, deepen to an intense shade of purple. Purple - definitely not blue! I thought, however, that perhaps it needed to be darker as not all of the colour would be absorbed so went ahead.


It took a while though before I was convinced that I was going to end up with blue fabric. When I first immersed the fabric, it sucked up the dye and turned an insipid shade of lilac! I spent the first half hour of stirring trying to tell myself that perhaps a purple corset wouldn't be so bad.

Uh oh - pale purple fabric!

 But, miraculously, as I stirred and stirred for the next hour or so the fabric became darker and darker purple and then, slowly, began to turn blue. Having studied textile histories I do have a basic understanding of dyeing processes, but actually watching it was rather like magic and how it went from a deep purple to bright blue remains a mystery. When is was time to remove the fabric from the bath it was a very bright shade of royal blue - not quite what the shade on the packet but OK and I suspected some of the colour would come back out in the rinsing.


The light is not particularly good in this picture, but the blue was very bright
Next came the hard work - it took absolutely ages of rinsing and wringing until the water began to run clear and even more colour came out when I washed the fabric in warm water. But eventually it was thoroughly washed and rinsed and ready to dry naturally. At this stage, it was still quite a bright blue and I left it to dry overnight. When I woke up in the morning, the first thing I did was to check the fabric and was surprised to discover that it had dried to a deepish shade of cornflower blue, nearly identical to the colour spot on the packaging!

The dried fabric - AFTER

I rinsed the fabric again in the machine for good measure to make sure any remaining dye was removed and then dried it and pressed it and pressed it and pressed it to get rid of all the creases from the washing, stirring and wringing! This was probably the one down side of this method. It wouldn't be great for delicate fabrics and it took a long time to de-crease. Having said that, having a steam generator iron really helped.

Despite all of the elbow grease required, the end result was very satisfactory. I now have all of my pieces cut out and ready to go, silky smooth and exactly the shade I imagined them. Hooray for Dylon! And although they definitely weren't around in 1880, I can't help thinking that my corset is going to be a beautiful shade of Smurf-blue!


And, just to finish, here are some sneaky peeks of my experiments with the leather and some lace to get an idea of what the finished piece will look like...


In my next corset post I will share the mock-ups of the corset and what I did to adapt the pattern to fit. And hopefully this week I will actually be able to start constructing the corset now that my spoon busk has arrived. All will depend on how my experiments with sewing the leather go...Any tips much appreciated.

Saturday 30 January 2016

Slow progress...

I have been a little quiet for the past few days, partly due to a horrible cold and persistent headache. However, between trying to sleep off my headache and working my day job, I have made some progress on my 1880s corset. Hopefully I will get round to posting about this shortly to update you on my experiments with blue dye and pattern mockups. In the meantime, this is just a quick promotion for my Etsy shop where my girls' mid Victorian underwear is now for sale. You can find out more over at La Belle Modiste.

Wednesday 20 January 2016

Inspiration for an 1870s/1880s corset

 Ever since I made my first corset, I've been promising myself that I would make myself a fancier one. However, as corsets are rarely destined to be seen, this project continually got pushed off the bottom of my list by other more pressing needs, such as more dresses to wear over the corset that I already had. It would be all very well having corsets in five colours, but who would know?!

Recently though, thanks to a new lifestyle away from teaching which means I actually have time to go out and have fun, not to mention exercise, I have lost about 4 inches round my waist. A new corset has therefore become more of a necessity as my old trusty white coutil mid-victorian corset now practically closes at the back.

When it came to choosing the type of corset I wanted to make, there were a number of factors in my decision. Firstly, I wanted to make a coloured corset, so a later date made sense in line with when more fancy colour choices became fashionable. This also fitted in perfectly with my costume plans for this year as I am really keen to get started on a trained 1876-1882 natural form gown which, of course, calls for a longer corset to achieve that smooth line over the hips, necessary to wriggle into a figure-hugging 1870s concoction. And finally, I fell in love with this...

Victoria and Albert Museum - Corset, 1883
This corset is on the front cover of one of my fashion history dictionaries and I spent all of last year, throughout my Masters studies, looking at it longingly every time I opened the book. I love the combination of colours and textures and particularly the use of the leather over the boning channels.

So I set out to find a pattern close to this design and was delighted when I came across Reconstructing History's Ladies' 1880s Corset (RH944) which is very similar in shape.

RH944 - From Vena Cava Design

With the pattern all ready to go, I started to look for some more extant corsets to inspire my design and interpretation of the pattern. As well as the V&A corset, I also came across this corset with leather boning channels.

Met Museum - Worcester Corset, c.1898
And, inspired by Edouard Manet's "Nana", I looked for blue corsets to get some ideas for the kind of shades that I could aim for.

Edouard Mant, "Nana", 1877
Chicago Museum of History - Corset, 1884
Blue Silk Corset - (found here)
Kyoto Costume Institute - Corset, 1880s
The pale blue is probably the closet to the original portrait, but I am tempted to go a little darker as I love the rich dark blues of the other two examples. However, since I plan to dye the corsetry satin myself I have yet to find out how much control I will actually have over the resulting shade. I have a feeling it may just be "throw it in and hope for the best"! Fingers crossed it will come out somewhere between these examples.

Anyway, taking my inspiration from all of these corsets, my final design features blue silk satin with pale tan leather boning channels, lace trim and a spoon busk.


And here's the design in my album with the inspiration pictures...


I have already started work on mocking up the pattern and I will be sharing the initial stages of my cutting and fitting alterations in my next post. That's after I've been to buy the blue dye tomorrow morning! Hopefully, I will end up with a beautiful corset and lots of posts to share as it all fits together. On the other hand, I might just end up looking like a Smurf if all goes wrong with the dye! But then life wouldn't be fun if it wasn't for new experiences.

Sunday 17 January 2016

Another HSM Challenge complete (almost!) - Girl's 1850s/1860s underwear

This project took a little longer than anticipated but, after a few mishaps and frustrations, it is (almost) finished. Designing and making children's costumes has been on my list for some time as I love miniature things and the idea of creating a tiny outfit with all of the features of adult 1860s dress, just shorter and cuter, really appealed to me.

I was particularly inspired by photographs, fashion plates and originals like these:

From Pinterest - https://uk.pinterest.com/pin/276760339577371220/
Borrowed from Val's post about little girls dresses at Time Travelling in Costume
An original costume from the FIDM Museum found on Pinterest - https://uk.pinterest.com/pin/54746951697569668/

Modes de Paris 1855 found on Pinterest - https://uk.pinterest.com/pin/321303754637425981/

However, not knowing any little girls who could wear the costumes, it has, for a long time, been just one of those ideas that gets pushed to the bottom of the pile. But, the opening of my Etsy shop encouraged me to start experimenting with some girls' dresses - I may not have little ones to dress up bit hopefully others out there do!

The first step was therefore to create some underwear for the correct silhouette and these are my prototypes pieces. I learnt quite a lot along the way and made a few errors (that I can happily avoid in the future) which I will detail below. As a result, I am not planning to sell these garments at the moment but now that I've got the construction sussed, the new and improved versions will be available soon on Etsy (fingers crossed).


GIRLS' 1850s/1860s UNDERTHINGS - Drawers, Crinoline and Mock Corset Bodice 

For this challenge I have created three undergarments for a girl aged approximately six years old. There are a pair of split drawers, exactly like an adult version just a lot smaller, a hooped crinoline skirt, and in order to support this and make the ensemble more comfortable to wear for a young child, a simple bodice stitched to resemble a child's corset. The crinoline buttons onto the bodice which allows the shoulders to support any weight and prevents any discomfort around the waist. This may not be 100% authentic but, as I am developing these pieces to be worn by modern little girls, I want them to be as wearable as possible.

The Challenge: 
Procrastination. As I mentioned above, tiny little dresses have been something I've thought about sewing for a long time but I never really had any reason to. I did get started on this project just before Christmas though - I had all of my patterns and fabric and so on all ready to go, but then sewing Christmas presents and other general festivities got in the way. When I saw the theme for January was procrastination, I knew right away that this was one of the projects that I wanted to get finished.


Fabric:
The split drawers are cotton lawn with cotton broderie anglais trim. The mock-corset bodice is a stiff cotton twill and for the crinoline I used a remnant of poly cotton broderie anglais that, quite handily, had a deep decorative border on both selvages. Given that the skirt is so short, this meant that I could cut the front and back alongside each other using the borders as a hem on both pieces.

Pattern: 
I used Butterick's 5901 pattern for inspiration and also as a guide for children's sizing as this is something I don't have any previous experience of. I worked quite freely though, only really using the bodice pieces to ensure the correct fit and cutting the other sections myself. I used my own methods for construction and didn't refer to the pattern instructions hardly at all. I also altered the numbers of hoops from three to two, changed the arrangement of tucks on the drawers and created my own system for attaching the crinoline to the bodice rather than having a separate petticoat underneath.


Year: 
Mid-Victorian 1850s-1860s

Notions:
Thread, bias binding, boning tape, 1" flat cotton tape, a shoelace for the drawstring on the drawers, 4 mother of pearl buttons on the bodice, 6 tiny antique buttons for attaching the crinoline to the bodice and boning*.

* A note on polyester boning: This is something that I have always avoided in the past, never believing that it could possibly be strong enough to hold its shape. And I was right! I had decided to use it on this occasion as I thought that it would be both lighter for a young child and more economical. I also, mistakenly, believed that the small size of the crinoline would compensate for the lack of strength in the boning. How wrong I was! The plastic boning was a complete disaster, failing to hold its own shape even without any form of skirt placed over the top of it. I thought at first that adding the second and third bones would help but in actual fact this made matters worse as the bones bent and twisted in different places and tangled themselves up in ways that didn't even look physically and scientifically possible. What's more, when I draped a thin circular cotton skirt over the top to see if balanced weight on all sides would correct the problem the whole thing collapsed!

Badly behaved boning - and that's only one hoop!


Fortunately I had some spiral steel boning on hand for a corset so I removed some of the polyester boning and tried the metal with much better results. The steel held its shape and is not as heavy as I though it would be as what I had was 7mm spiral steel rather than the wider spring steel I usually use for crinolines. I have therefore learnt my lesson and will be replacing the polyester with the steel as soon as I have cleaned it up. Unfortunately I didn't realise it was dirty until I had threaded it through the boning channel and found grey smudging all around the openings, one of the reasons that I will be keeping this set of underwear as a prototype. Especially as my sewing machine helped out by adding some oil to other seams! So once the boning has had a bath in some white spirit I will be able to replace the bones for a sturdier crinoline.


How historically accurate is it?
Overall the shape and silhouette are accurate. The drawers are just a miniature copy of adult split drawers with the exception of being longer and showing beneath the dress, a style that is often seen in period photographs, especially on younger girls. Similarly the crinoline creates the correct shape and the bodice does echo the shape of some extant children's corsets that I have seen. However, it is not actually a corset (I simply stitched lines to imitate boning channels) and I am not sure about the system for buttoning the crinoline onto the bodice. Having said that, many children's corsets did button rather than lace and it doesn't seem impossible that the crinoline would have been attached to the corset in some way as this was not unheard of in adult dress and would have made life easier for the child. As for the materials, the use of cotton for the bodice and drawers is accurate, but the broderie anglais poly cotton is not. This was a more commercial choice on my part in order to make the ensemble prettier without spending hours adding tucks and lace and so on. However, in future I will be looking at creating completely accurate ensembles as well so that people have the choice based on what they need the costumes for. It should also be noted that for a more authentic look a chemise should really be worn underneath these as well as a modesty petticoat.

A close up of the buttons and the stitched mock boning channels

Hours to complete:
In total probably about 6 or 7 but this involved a fair amount of thinking, figuring things out, experimenting and fighting with boning as well as tracing and drafting pattern pieces.

Tiny tucks and lace on the hems of the drawers


First worn:
I haven't yet found a little model this size and I don't have a child-sized dress form so the dress has only been modelled by my wastepaper basket! This is a trick I have used before when sewing an 1850s skirt for a young lady with a 24" waist. This was far too small for my mannequin but I needed to pleat the skirt directly onto a waistband placed around a body form. The only thing that I could find with the correct circumference that I could balance on my mannequin stand was an upside down wastepaper basket. And it actually worked quite well for modelling this dress. The twill bodice is quite stiff and the decorative stitching helped reinforce it to stand up by itself so I could get some good pictures.

My mannequin - a wastepaper basket balanced upside down on the feet for my dressform!

Total cost: 
All of the materials that I used were from my stash, with the exception of the steel boning. My estimated cost for these if I had to buy them is around £15, although I haven't yet completed my official calculations for pricing the items.


All in all this has been an exciting project and I'm glad that the procrastination theme encouraged me to get stuck in with this one. I can't wait to start designing and making dresses to go over these little ensembles and I am also planning to experiment with drafting more authentic ensembles with chemises and proper quilted or corded children's corsets. Watch this space!

Saturday 9 January 2016

My Liebster Award Post - probably the longest post ever!


I mentioned a couple of days ago that I had been nominated by Hannah of Fact & Fiction for the Liebster Award. However, it has been a busy start to the New Year finding and settling into a new job, as well as completing my first sewing project of the year, and I have only just got round to sitting down to make my own nominations and answer Hannah's questions. What's more, since the first nomination, I have also been nominated by Kristen at The Victorian Needle. I'm so excited to have had two nominations so suddenly and hope that it is a good omen for my sewing and my blog this year!

As mentioned in my previous post the rules of the award are as follows:

1. Acknowledge the blog that nominated you.
2. Answer the questions the nominating blogger asked.
3. List 11 bloggers with less than 200 followers that deserve some recognition.
4. Write 11 questions for them to answer.
5. Notify them that they have been nominated.

To prevent this becoming a mini dissertation (in theory at least) I have combined both Hannah and Kristen's questions so that there are still only eleven to answer. Here they are...


    1. What started you off in sewing?  When did the creative bug hit you and what or who sparked or inspired it? 
    My first ever costume for the Llandrindod Wells Victorian Festival Grand Ball - typical of me to start with something as complicated as a ball gown!

    For as long as I can remember I have always loved pretty dresses and my interest in history naturally led to my fascination with historical dress and fashion. My Mum also taught me to sew and knit at a young age which must have sparked my enjoyment for handicrafts involving needle and thread. I didn't really start to dress-make though until I was about 16, although I did enjoy knitting before this. After leaving school, I started to get really interested in vintage fashion and my Mum helped me to create my own wardrobe of vintage-inspired clothes using original patterns. At first she did most of the sewing but I soon started to want to be able to make my own things. Within a year, I had made the leap from seamstress to historical seamstress. It had long been a dream of mine to be able to recreate the kinds of costumes that I had discovered online ( I was particularly inspired by the work of Katherine and her website www.koshka-the-cat.com) and the chance came when my parents mentioned that they would be holidaying in Llandrindod Wells, in Wales. This was, they reminded me, that town we had been to once when I was younger where they held a Victorian festival every year. Victorian Festival!! That got me right away! And that is how I came to make my very first historical costumes, learning as I went from patterns, books and online tutorials and I haven't looked back.
    1. What made you decide to start blogging? How have you grown as a blogger?
    From the very beginning, I always intended to blog about my costumes, having been inspired to get involved in the historical costume world by blogs in the first place. Also, as I didn't know anyone else that shared my hobby at the time it seemed like the perfect way to be able to share my new passion with others. Over time I have developed my confidence in writing posts and am gradually becoming successful at posting more regularly. I have also expanded the number of other blogs that I read and this year I am planning to vary the types of posts that I write to include step-by-step breakdowns of my projects in progress. That is if I remember to take the step-by-step photographs which I am not very good at remembering to do! Hence why I have never posted a tutorial/work-in-progress type post...
    1. What is your favourite time period to dress in and your favourite project so far?

    Dancing with my Dad wearing my white muslin 1850s ballgown. This is the best dress to dance in ever! It is so light and I love the way it moves.

    So far, I have mostly only created Victorian costume of the 1850s/1860s and the mid-1880s. Of the two, I love the look of the 1880s but prefer to wear the cage crinoline fashions of the mid-century. I find them more comfortable to wear for long periods of time because the crinoline distributes the weight of the skirts much more evenly around the whole body and I love the way they move, especially when dancing. There is something about the feel and swish of the skirts that never fails to make you feel like a princess and dancing at a ball is never more fun than when you twirl around and around in a crinoline skirt! As for my favourite project, I think they have all been my favourite while I was working on them and then I am always eager for another more exciting and difficult challenge. I especially 
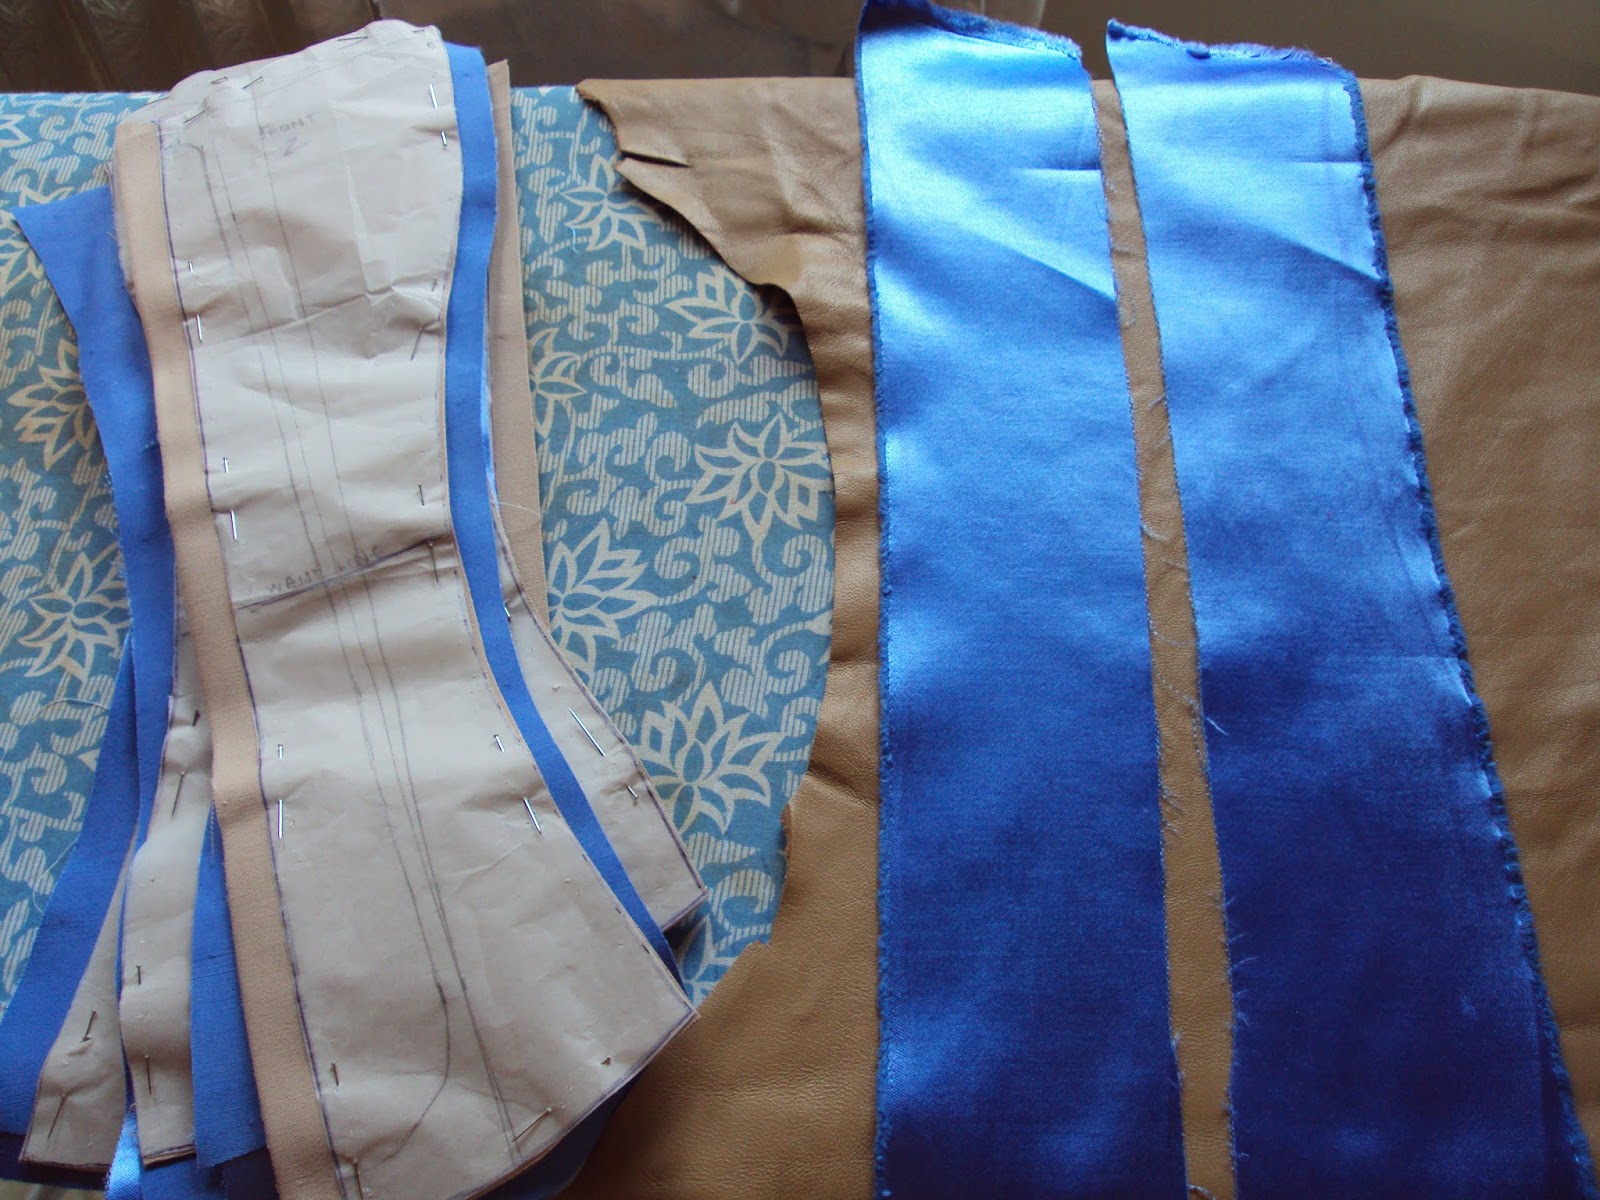
enjoyed making my first corset though as this was something completely new to me and felt like a real achievement.
    1. What is your favourite costuming book/resource?
    This is a very difficult question because I cannot resist a good costume book, however expensive (which is unfortunate since they rarely come cheaply!). I have quite a collection already and use them frequently when researching and designing. Some of my absolute favourites include The V&A's Fashion in Detail Series, "Victorian Fashions and Costumes from Harper's Bazar 1867-1898" and "La mode du XIXe siècle en images".


    1. What three tools are the most loved in your crafting room and what item do you lose the most while sewing?
    The second part of this question is the easiest to answer. I am always losing my tape measure. It doesn't matter whether I hang it round my neck, tie it round my wrist or pin it to myself, it always manages to escape and slither away like an errant snake to hide under the nearest table, chair or pile of fabric so that I can never find it when I need it. And when I say "it", what I actually mean is "them" because even with three tape measures I can never seem to find one when I really need it!

    The most useful tool in my workroom (also known as my bedroom!) has to be Gertrude, my dressform. Although I haven't tried much draping yet, she is invaluable when it comes to fitting things for myself, figuring out the drape of bustle skirts, pleating crinoline skirts directly onto the waistband and generally proudly displaying my progress. One thing I would like to do this year when I get the chance is make a personalised form using ducktape for an even better fitting tool. 

    I also love my sleeve board. I bought it at a brocante for 5 euros when I was living in Paris and it is practically antique! What's more it is almost identical to one that my Grandad made for my Grandma. It's not just about the way it looks though - it is so useful for pressing seams, not just on sleeves but on anything that is small, fiddly, curved or won't fit over the ironing board.

    And finally, the latest addition to my tool kit is a magnetic pin dish. When I discovered this whilst browsing Vena Cava Design'sonline shop I thought they must have designed it especially for me. My pins have a life of their own and seem to migrate around the house of their own accord presenting a serious risk to unsuspecting bare feet. This is not helped by the fact that, no matter how careful I try to be, I always manage to somehow knock my whole box of pins onto the floor whenever I am sewing. However, if the blurb is true, even if I do drop this dish the pins won't fall out (I've tried shaking it upside down quite successfully) and you can throw pins from a distance and they stick to it, rather than missing and falling off the table.
    1. Are you very organised about completing sewing projects, or are you more of a whatever-takes-your-fancy sewer?
    I try to be organised and this year with so many projects and my shop to think about I have actually written a schedule for the whole year to try to make sure everything gets done and that I complete my Historical Sew Monthly projects in the right order and in time for specific events. Having said that, I can also be a whatever-takes-my-fancy kind of girl. I have stacks of fabric bought months ago for different projects, but that never stops me buying something new because it suddenly inspires me and making it up right there and then whilst the other projects sulk in the cupboard. When I am choosing a new project, I also tend to be inspired by whatever interests me at that moment, whether that is an event, something I've read about or an image I've seen or a particular fabric or trimming that catches my eye.
    1. What’s your first step when beginning a new project? Do you sketch? Start looking at swatches? Plan the accessories first while you work up to the big number?
    It depends. In the past I have started from a pattern that I liked, researched similar dresses and used this to create a design sketch which I have then worked from to sew the costume. I have also recreated costumes directly from photographs and fashion plates, matching and adapting patterns and fabrics to the dresses depicted. And sometimes it is the fabric or trimmings that inspire me - I find something and I can just see the type of dress that I want to make in my mind's eye. I find inspiration everywhere and it would probably take me 100 years to make all the costumes I plan and imagine in different ways!

    My first ever costume (1858 pink petal ballgown) was based on two Truly Victorian patterns. I traced the pattern drawings to create the base for my sketch and then looked to fashion plates for inspiration for my choice of colours and trimmings.
     
    This 1860s velvet winter ensemble was based on photographs of Empress Elisabeth (Sissi) of Austria
    1. What form does your fabric stash take, and how do you organize it?
    The problem with my fabric stash is that it has no form and no organisation. I am afflicted by a disease that affects many costumers known as CHH - Compulsive Haberdashery Hoarding! This means that when I see anything that I can be creative with costume-wise - fabric, trimming, buttons etc. - at a price that I can afford and that I know I may not be able to find again, I have to buy it. Friends and family also contribute with bits and pieces that they know I will appreciate and the result is that my stash probably takes up more space than the rest of my belongings put together! So much so that some of it lives with me and some at my parents' house because I can't find room for all of it. Having said that, reducing it is definitely not an option as it is a constant source of inspiration and will keep me in clothes and costumes for years to come. However, in future I may have to think about organising it as sometimes I find things I didn't even know I had. I dream of having a workroom where I can store it all according to type and colour but for the moment that's taking it a bit too far!
    1. If you could buy yourself one present for your sewing room, what would it be?
    Well, to start with, I would quite like to buy myself a sewing room! But seeing as that is not within my budget I would be happy to settle for a large, sturdy table for cutting out that wouldn't need to be protected from scissors by large cardboard sheets that slide about and wouldn't shake and wobble when I use my sewing machine.
    1. If time and money were no object, what new place would you visit and what new crafting skills would you like to learn ?
    I would love to have the chance to visit the USA and participate in some historical/reenactment/sewing events. I dream of one day being able to attend Costume College and I would also like to have the chance to dance at a Civil War ball. In terms of crafting skills, I received Allsion Lowery's "Historical Wig Styling" book for Christmas and I would love to be able to learn to hand-tie and style my own wigs to get the perfect look for my costumes. I am also keen to develop my lace-making skills and I have always been fascinated with thread buttons.

    1. What’s the last really great book you read?
    I am currently reading "Isabella and Sam: The Story of Mrs Beeton" by Sarah Freeman. As well as being well-written and easy to read it is a fascinating story and a real insight into this unique and unusual woman's life. It completely shatters the myth of the homely Victorian cook and housewife that Isabella is often assumed to have been and paints a picture of a young, determined and talented journalist who collaborated on an even footing with her husband in his publishing business, achieving astounding things for a woman of her time only to die tragically young. I am only about half way through but I would definitely recommend this book.


    Nominees

    Whew!! Dissertation over! Now it's somebody else's turn. My search for blogs with less than 200 followers lead me to make several new discoveries and these are the blogs that I would like to nominate. I didn't quite make it to eleven as I discovered when writing this post that The Shadow of My Hand and Mon Armoire Magique have been nominated before, but I think nine is close enough.


    1. Frolicking Frocks - I am not sure if Natalie is still blogging but I love her Tissot Picnic Bustle Dress so much (not to mention being jealous of the whole concept of a Tissot Picnic!) that I had to nominate this blog. Maybe a nomination will inspire Natalie to share more of her wonderful costumes... I hope so.

    2. Couture Historique - I love reading Lindsey's blog as the pictures always look like she and her friends really have stepped back in time. I am envious of the beautiful period settings and the detail and authenticity of her costumes are wonderful.

    3. Sewing Experiments - I first started following Natalia's blog when I saw the stunning photographs from her Rococo photoshoot of her 18th century robe à la francaise. Her costumes are so original and inspiring and I love her attention to detail and creative photoshoots.

    4. Madame Modiste Historique  - I've nominated Kat partly because I love the subtitle of her blog (sipping champagne while wearing pretty dresses is definitely my idea of fun) but also for her fabulous Tudor dress inspired by Katherine Howard. I also admire her bravery in taking on pattern drafting and enlarging with no previous experience, something I haven't yet worked up the courage for!

    5. I
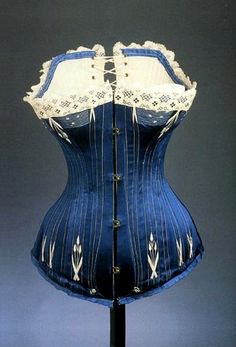
sabel Northwode Costumes - Peryn's blog is new to me but what I've seen is really inspiring. I love her 1876 blue corset and her post on the making of a pair of 1780s stays is fascinating. I would like to start explore 18th century costume and this kind of post is so helpful for learning about new techniques. Not only that, but she is studying for the same Dress and Textile Histories Masters course that I completed last year!

    6. Ruffs and Rollerskates- Another great title. I love the idea of this combination! And in terms of costume, Lindsey's blog offers something different too - the 16th century isn't very common period for the majority of the blogs that I follow and I found her detailed posts on the creation of her 16th century Venetian gown really interesting.

    7. Stepping into History - This is another blog that is new to me. Danielle is a reenactor and posts both about reenactment and her costume sewing projects. I love reading her posts and am particularly impressed and envious that she has been ice skating in a crinoline!

    8. TwilaTee - Twila Tee is on a mission to costume the world, a valuable cause which I heartily applaud! Not only this but her "making of" and tutorial posts are brilliantly detailed, something I aspire to for my future blogging.

    9. Eva's Kleidertruhe- My love of costuming and costume blogs is now so extreme that I even enjoy reading blogs in languages that I don't understand! Fortunately Eva is kind enough provide translations for those of us who don't speak German so that we can appreciate her beautiful projects.


    (P.S. My apologies if any of these blogs do actually have more than 200 followers - I did my best to check but not everyone seems to display their follower numbers - or I don't know where to look...Similarly, I am not certain that some of these blogs haven't been nominated before...)


    These are the questions that I would like to ask my nominees:

    1. What aspect of creating historical costume do you enjoy the most? The research, the design, the making, small details, learning new skills, wearing the costumes?
    2. What is your perspective on historical accuracy and what aspects of this do you prioritise when sewing (cut, construction, techniques, fabrics etc.)?
    3. What kinds of research do you do when planning a new costume?
    4. What are your favourite sources of information for learning more about historical costume?
    5. Where do you shop for fabrics and what influences the fabrics you buy?
    6. What is your favourite fabric to work with and why?
    7. What do you get out of sharing your costumes with the historical costuming community online?
    8. What is one of the most valuable things you have learned from other bloggers about creating historical costume?
    9. Which of your projects have you learnt the most from?
    10. What is your favourite reaction to one of your costumes/you wearing one of your costumes?
    11. If time and money were no object, what would your dream project be?


    And that completes the longest post in the history of my blog. Many thanks again to Hannah and Kristen for nominating me and wishing everyone happy costuming!